The Perfect Chocolate Chip Cookie

Photo via bettycrocker.com

Photo via bettycrocker.com

Every single time I make chocolate chip cookies, I am kinda disappointed. They taste pretty good, but the consistency is NEVER RIGHT. You know how mad I get when the cookie part spreads out really thin and crispy, and then you hit a burst of chocolate chip a couple times? I hate that. Or when they’re thick, but too hard? It’s so difficult to get it the way I like it!

So I’ve been experimenting for a while, combining different recipes and tips, and I’ve finally found it. The PERFECT (to me) chocolate chip cookie. The primary keys to this recipe are fiddling with the baking temperature, butter consistency, amount of chips, and size of the dough balls.

As I mentioned, I’m totally picky about my cookies. And Robbie doesn’t like sweets enough to eat something unless it’s awesome. But he gobbled these up. I really made them for us to munch on during our recent road trip up to North Carolina, and on the way back, Spencer (our little dog) was trying so hard to co-pilot from the middle console that he stood right on top of the cooler and crushed them into small pieces. Robbie’s response was, “Dammit, Spence! Is this the last bag?”

Unfortunately, it was, because I had left the rest at my parents’ house for them to enjoy. My mom is kind of a health food nut, so my dad is always pretty excited if anyone leaves him something to eat that is not a gluten-free rice cracker. So now we have one small ziplock bag of mostly broken cookies in the refrigerator that everyone is trying to avoid. So sad. Must make more immediately!

The Perfect Chocolate Chip Cookie

2 1/4 cups flour
1 cup brown sugar
1/2 cup white sugar

1/2 tsp baking soda
1/2 tsp salt
1 tsp vanilla
1 1/2 sticks melted butter
1 egg
1 egg yolk
1 whole package chocolate chips
I also threw in about 1/4 bag of Heath bits just because I found it in the pantry.

Mix everything together with a spoon (not electric mixer! *hand smack*). Place ping-pong-ball-sized balls of dough on ungreased cookie sheet about 1 inch apart. Or golf ball sized, or whatever your sport of choice for non-athletic people is. I don’t think the order of adding ingredients really matters, but I basically mixed all the dry stuff together and then added the wet ones, with the chips coming in last.

Here’s the important part: preheat the oven to 425, but as soon as you put in the pans, turn it down to 375. Bake 11-12 minutes. Let cool on the pan for 10 minutes before removing. If you have to bake in more than one batch like I do because I don’t have enough pans, turn the oven back up to 425 each time before inserting the pans, then turn it back down to 375 while baking.

I think this temperature tweaking is the secret to the crisp on the outside, chewy on the inside miracle! I didn’t invent it, though. Like I said, I have been reading and trying different things, and this temperature fiddling was suggested on another blog. And it totally worked magic!

Easy Guacamole (No Measuring!)

Photo via chow.com

Photo via chow.com

Robbie makes tacos for dinner about twice a month, because he is the master of anything involving ground beef, and I just don’t prefer cooking with it for some reason. It’s not that it’s difficult. And I don’t mind eating it usually. I just think it’s weird. I don’t know why. We all have our quirks. For example, Robbie hates the way microfiber towels feel, and he can’t stand to touch loose change because it smells weird and is dirty. So, I am the change jar roller! And he is the ground beef cooker. And I no longer buy any type of microfiber towel. But anyway.

Robbie takes real pride in his secret seasoning combinations for steaks, burgers, taco meat, sloppy joes, and the like. And I find it totally impossible to cook refried beans properly, and he is actually very good at that, too. So, this is why he is in charge of taco night. Plus, I get to watch TV on the couch with my beer while he does all the work! Yassssss.

My ONLY job on taco night is to make the guacamole, which we use for dipping tortilla chips in while everything is cooking, and also for putting on our tacos as an extra condiment. Before he met me, Robbie had never had guacamole or avocados in any form (I KNOW!), and he claimed to not like it. He was afraid to try it the first time I made it for him. But I forced it into his mouth! Muahaha!

And he loved it. Now he asks for it any time we eat anything remotely related to Mexican cuisine. Sometimes I let him taste-test to make him feel like his opinion matters. Ha!

Funny story: Once, I tried to grow an avocado tree using the pit from an avocado I used to make guacamole. There are instructions on Pinterest for this. It started out really easy. Just skewer the pit with toothpicks and set it over a glass of water so it’s about half-submerged. It grows roots, then a stalk, then leaves, and then hopefully about seven years later you have fruit. Mine grew roots, and a stalk about three feet tall, but it never, ever grew any leaves. Everyone who came to our house asked why I had a stick in a flower pot. It did not make the move with us to the new house.

I am all about recipes that don’t require exact measurements. I’ve played around with different ways to make guacamole over the years and finally have a pretty good process that, in my opinion, is just as tasty (if not better) than the tiny $5 bowls you get at Mexican restaurants. The best part is that you don’t have to measure anything at all! Unless you are just very Type A and want to make sure it is totally perfect. I can relate to that, too.

Easy, No Measure Guacamole

2 avocados
2 tbsp salsa
2 tbsp sour cream
1 tsp lemon juice
1 tsp garlic powder
1 tsp salt
On rare occasion, I also add a couple tablespoons of minced onion for a little crunch.
(All measurements are approximate!)

Cut the avocados in half and remove the pit. Use a spoon to scoop the meat out into a bowl. Mash with a fork until you reach the consistency you like. Some people like their guac a little chunky; some people like it smooth and creamy. If it doesn’t mash easily with a fork because the avocados are not quite ripe enough, you can use a fork and a knife to cut it up into tinier, mashable pieces.

Stir in the salsa and sour cream. I don’t use the tablespoon from my measuring spoon set. I just use a spoon from my eating utensil drawer — not the small cereal spoon, but the larger one. Like the one you would use to mix ingredients. I have no idea if that is actually the same as the measuring tablespoon or not. It seems close.

For the other ingredients, I just cup my hand as if I was trying to collect a handful of water from a faucet. I fill up the little divot it makes in the center of my palm with each ingredient and dump it in, stirring to mix well. That’s it!

Obviously, you can taste it as you go and adjust the amounts according to what you like. I don’t let Robbie taste-test it anymore, because he always asks for more salt than I normally add. But when I just present it to him already finished, he never mentions it needing more salt. SO. THERE!

The lemon juice seems to help it from turning brown so quickly in the refrigerator, and I can keep it for about 2 days after it has been made to use for leftovers. Be sure to cover it with plastic wrap, though! Enjoy on your own Mexican dinner night at home! Because who can even afford to go out to eat anymore?

Chocolate Caramel Heath Bar Cake

Photo via Taste of Home

Photo via Taste of Home

When Robbie and I were in North Carolina this past week visiting my parents for a few days, my mom had made this cake for us to munch on during our stay. She knows we are both big Heath Bar fans — I made Robbie a Heath Bar cheesecake for his last birthday cake and may have eaten more of it than he did.

I’m not sure where she originally found the recipe. There are several versions of it online, but I’m posting this one because she (of course) tweaked it to suit her better, and when I make it for us now that we’re back home, I am not going to change even one single thing! Robbie told her it was THE BEST CAKE HE HAS EVER HAD. We both raided the refrigerator every night around midnight, like teenagers with the munchies, tiptoeing around so we didn’t wake any adults, whispering, and giggling. Robbie’s tip for sneaking around: always walk on the balls of your feet!

Here is Vicko’s version (in her own words) of this amazing, gooey, chocolatey, candyriffic, moist, fluffy deliciousness.

Chocolate Caramel Heath Bar Cake

1 box Devil’s Food cake mix
1 1/4 c. diet Coke
1 egg (calls for 1 egg white, but I used whole egg)
Mix with mixer on low for 1 min. Pour into sprayed 13×9 pan. Bake at 350 25-30 min. until done.

6 oz. fat free caramel ice cream topping
1/2 can fat free sweetened condensed milk (OOPS! I used a whole can!!! No wonder it was SO gooey! Do what you want)
Bag of Heath Bar Bits
8 oz. Cool Whip Fat Free

Heat (don’t boil) over med. low heat, stirring until smooth. Do this about 10 min. before cake is done. You want it to be very warm as you spoon over cake. Poke holes in cake when you get it out of oven and pour/spoon this over as evenly as you can. I use Kebab skewers to poke. Sprinkle 1 c. Heath Bar bits over top. Let cool completely. Cover with 8 oz cool whip and sprinkle 1/4 to 1/2 c. heath bits over top. Keep in refrigerator. Such a good cake!

Tasty Thursday: Stuffed Mushrooms

I don’t attend or host many events that require party food, but for some reason I make a lot of it for myself to eat. I make my own party, yo! LOL. This is a pretty tasty recipe that I modified from one I found in a magazine to suit my liking, so I am claiming it as my own invention. And look! I actually made a picture of THE ACTUAL dish! Pioneer Woman, I am not. I am the single, childless, broke version of her. So, actually not like her at all.

Stuffed Mushrooms, Megs Style

2 16 oz. pkgs of whole mushrooms (You can use portobello and be all fancy, but I kinda prefer the milder flavor of regular button mushrooms.)

8 oz. cream cheese

1/2 cup shredded sharp cheddar

1/4 cup crumbled feta

2 tbsp. bacon bits

1 quarter of a large onion, minced finely

1 tsp. garlic powder

salt and pepper to taste

Soften the cream cheese in the microwave for a minute. Dump it with  everything else in a bowl (not the mushrooms) and beat together with a mixer.

Rinse the mushrooms to get the dirt off. Ina Garten says you shouldn’t rinse mushrooms, but just use a damp sponge to brush the dirt off. But that idea kinda grosses me out, and I seriously dislike unexpected grit in my teeth, so I wash mine. Pop out the stems and discard (or set aside to use in another recipe, like chicken and mushroom quesadillas, which is what I do). If the stem doesn’t pop out cleanly, use the tip of a case knife to carve out the rest.

Stuff each mushroom with about a teaspoon of filling. Put them in a baking pan. You can spray the pan to prevent sticking, but the mushrooms produce a lot of juice in the process of cooking, so it’s not really necessary.

Bake for 22 minutes at 375 degrees. Enjoy!

If you are not a big mushroom fan, this also makes a really tasty hot dip for toasted pita points or garlic crostini, or even just fancy crackers. Just put the filling in a baking dish instead of stuffing mushrooms with it, and bake as directed. You can even top with a bit of cheddar at the end and put it back in the oven for that to melt. Good served hot. Although I’ve also been known to eat it cold on various breads. Whatever. It’s cheese and bacon. It’s never bad.

Bruschetta

bruschetta

Sometimes you follow recipes to make things and there’s just a little something wrong. A little something missing. I guess I always used to think that following a recipe would ensure that at least I wouldn’t be the one to blame if something was a little off. But lately I’ve had so many experiences with recipes being not that great that I’ve started just trying to make up everything as I go. For the most part. Unless it’s something I have no clue about, like bread. The last time I made bruschetta, I followed a recipe and it came out all wrong. Didn’t taste quite like I wanted. The bread was a little too soggy. And so on. So last night I decided to use up half a loaf of french bread left over from last weekend’s birthday festivities. I totally made it up as I went along, and this time it came out excellent! So I figured I should probably document that, at least for me in case I want to make it again, as much for the two people who read this blog.

Bruschetta

Preheat oven to 400 degrees F. Slice up some french bread and place slices on a baking sheet. Drizzle the slices with extra virgin olive oil. Sprinkle them with garlic salt and Kosher salt. Then sprinkle with some shredded colby jack cheese. I also added some very fine crumbles of feta cheese. On top of that, pile up some finely chopped tomato. Pop it in the oven for about 15 minutes. Perfecto! Just long enough and hot enough to get warm and melty.

Tasty Tuesday: Cupcakes in Jars

cupcake_in_a_jar

In full disclosure, I did not take this picture, nor did I come up with this idea by myself.

Recently BC moved in with Coocatchoo and became the newest resident in our building. And his birthday was on 9/11 — same as my cousin, Nick. I decided at the last minute that I had to do something nice for him. But he’s a picky eater, and I only had an hour or so to put together a boy-friendly birthday-and-welcome gift. The solution: cupcakes in jars. Perfect for them to take on their trip to the mountains for the weekend, where they rented a house that turned out to be haunted and couldn’t do any hiking because of BC’s unfortunate toe injury. Meanwhile, I was camping with the still-in-recovery Swamp and busy getting poison ivy all. over. myself. What is with everyone’s luck this summer? Man.

Anyways, about the cupcakes in jars…I think the magic of these cupcakes, which everyone says taste better than normal cupcakes, is the ratio of cake to icing. You get way more icing in there. I made cupcakes (funfetti) and icing (cream cheese) like normal. Then I got out my half-pint jars with lids. I put a spoonful of icing in the bottom of the jar. Then I cut a cupcake in half vertically and iced the outside. I placed it in the jar on one side. Then I took the other vertical half of the cupcake and iced all the way around it, with a good thick layer on the side that would be in the middle. I also added some sprinkles to that layer. Then I slid it into the jar to form a whole cupcake again. It required a little tapping on top to get them secured. Added another spoonful (or two) of icing on top, and more sprinkles. Capped it, screwed on the lid, and added a circle of pretty paper on top. Voila!

Some people bake the cupcakes in the jars — they’re glass, it works fine. But I thought it was easier to bake them separately for better control over icing placement. If you give these as gifts, I recommend including a note about removing the lid by sliding it across instead of pulling upwards, so as not to remove the top layer of icing. I gave BC four of these because I had four jars, and I think it was a nice amount for two people. It’s a great gift idea, but it would also be a good solution for taking cupcakes to work (or school) with your lunch. You wouldn’t have to worry about the icing sticking to whatever it is you carried it in.

Coocatchoo is an admitted cupcake-a-holic, so she loved them. But my real joy came from hearing about BC, who is not even much of a dessert person, exclaiming that they were like the best cupcakes he’d ever tasted. Right before the haunted house made him dream it was kicking them out. 🙂

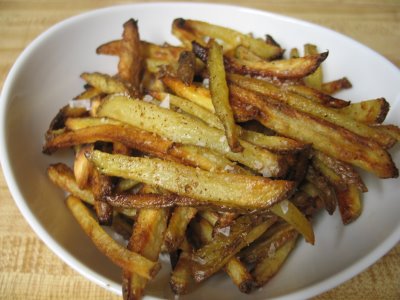
Tasty Tuesday: Truffle Oven Fries with Pesto Dip

IMG_4648

Okay people, don’t freak out about the fancy-schmancy title of this recipe. Today we are going to take the gourmet out of gourmet cooking.

BlackTruffleOil

The other day I found some black truffle olive oil on sale, marked down to about 80% off the original price. It seems astonishing, but apparently people aren’t buying truffle oil in this economy. Go figure. So, lucky me that I happened to spot this lonely bottle on the clearance table! Me, who loves to make gourmet things but can never afford gourmet ingredients. Fortunately, this recipe is still good without the truffle flavoring in case you don’t have it, but if you’re lucky enough to find some on sale, it’s a delicious way to introduce truffles into your cooking in a fairly subtle way.

I once read an article that described truffles as tasting and smelling like sex or lust. Fascinatingly, black truffles actually contain a sex hormone related to testosterone that is also found in the underarm perspiration of the human male and the urine of females. That hormone is also similar to a pig sex hormone. So this explains everything! No wonder pigs are so good at finding them, and humans consider them an aphrodisiac. Perhaps you’re thinking you don’t want armpit on your fries. Oh, but just wait. Don’t judge until you taste! (I promise if you don’t like it, I’ll come over and eat them for you.)

Truffle Oven Fries with Pesto Dip

4 medium red potatoes
2 tbsp. extra virgin olive oil
1 tsp. Kosher salt
1 tsp. fresh cracked black pepper
1 tsp. truffle oil

Preheat the oven to 400 degrees F. Slice your potatoes in vertical strips. Be sure not to get them too thin or they will be too floppy to dip when cooked. Between 1/4 and 1/2 inch is good. Throw the strips in a bowl with the olive oil, sea salt, and pepper. Toss to coat. Spread onto a cookie sheet that has been sprayed with non-stick cooking spray or a mist of olive oil. Bake for 30 minutes. Remove from oven and stir in pan to loosen and flip. Bake for 10-15 minutes more. Some will get pretty brown, so watch closely to prevent burning. Remove pan from oven. Transfer strips into a clean bowl. Drizzle the truffle oil over the top and toss again to distribute.

If you are nervous about the flavor, you can also add the truffle oil in the first step (with the olive oil) before baking. This will result in a less pungent taste. Technically you’re supposed to use the oil on cooked foods as a finish, but it’s okay to break the rules sometimes.

Pesto Dip

1/4 cup basil pesto (I use jarred.)
2 tbsp grated Parmesan cheese
1/4 cup extra virgin olive oil
2 cloves fresh garlic, minced

Just mix this all together and put it in a pretty container. The extra ingredients make the jarred pesto taste a little more homemade. Serve with fries as a dipping sauce.

See? You don’t have to do it the Martha Stewart, sweating-over-your-mortar-and-pestle way to achieve deliciousness. No one will ever know you didn’t grind that basil yourself. My lips are sealed!

Tasty Tuesday: Special Chicken

kiev-skyline

I’ve been making this chicken dish since high school — it’s one of my favorite recipes, and I tend to bust it out for just about all get togethers, dates, birthdays, and special occasions, because everyone seems to love it. It’s one of the few recipes I have memorized. When I learned how to make this, it was in a cookbook of my mother’s and titled, “Chicken Kiev.” That’s what we called it for many years, and some people still do.

But since true Chicken Kiev is made with a pocket and stuffed with butter and herbs, and then breaded and baked, it’s really a very different thing from this. So, I have taken to calling it “Special Chicken.” Friends, when requesting it, have called it “The Chicken with the Onions,” “Butter Chicken,” The One with the Bread Crumbs.” I considered “Party Chicken,” but my Nana already has a famous Party Chicken recipe involving chipped beef and cream of celery soup. Which sounds weird but is actually delicious.

Anyway, this recipe is easy and always a big hit, and involves a lot of butter. You can easily reduce the amounts listed here to make it a little healthier, or use Smart Balance or some kind of heart-healthier spread. I don’t really like to eat much that has unpronounceable ingredients or chemicals, so I use butter and try to moderate, unless it’s a special occasion, which is when I’d be making this anyway.

ChickenKiev13

Special Chicken

4 boneless, skinless chicken breasts (can also use tenderloins)
1 stick of butter, divided
1 onion, finely minced
1/4 cup of dry white wine
1/2 cup Italian-seasoned bread crumbs
2 tbsp grated parmesan
1 tsp basil
1 tsp oregano
1 tsp garlic powder
1/2 tsp salt

Preheat oven to 350 degrees F. In a small bowl, melt half the stick of butter. In second small bowl, mix together bread crumbs, parmesan, basil, oregano, garlic salt, and salt. Dip each chicken breast in butter, then in bread crumb mixture, coating well. Lay them in an ungreased 9×13 pan. Bake for 50 minutes.

Finely mince one yellow onion. In another small bowl, melt the other half stick of butter. (Don’t reuse from the first half stick — it had raw chicken in it.) Add the onion and white wine to the melted butter.

If you are in a pinch, you can use apple juice instead of white wine. Just makes it slightly sweeter and makes the chicken very moist. But very little difference in taste. If you are using wine, I recommend using slightly more than the 1/4 cup that is called for. Maybe like 1/2 cup. I think this helps the meat’s moisture retention.

After the chicken has baked for about 50 minutes, remove from oven, and pour the onion/wine/butter mixture over the tops of the chicken breasts. Use it all! Put this back in the oven for another 5-7 minutes, until the onion mixtures looks a little browned. Remove and enjoy! 

I prefer it eaten simply with any kind of potatoes and broccoli, because it’s just delicious on its own, but I’ve also used pasta with alfredo sauce as a nice base or side.

Tasty Tuesday: Roasted Vegetables

roasted%20vegetables

Little known fact: I love roasted vegetables. Roasting brings out natural sweetness and enhances flavor. Why would you steam when you could roast? Steaming is so bland. Anyway, roasted veggies are my favorite diet food, because it doesn’t taste like diet food. Here’s how I do it. I like to keep it simple, but you can go crazy with the variety of vegetables you use. In addition to what’s listed below, I also like to use cherry tomatoes and red, yellow, and orange bell peppers for added flavor. Green bell peppers, I am not so big on. I think they smell good, but I have a hard time choking them down. Below is just what I happened to have on hand.

Roasted Vegetables

1 yellow squash
1 zucchini
1 yellow onion
8 oz. fresh mushrooms
Extra-Virgin olive oil
Garlic powder
Salt and pepper

Preheat oven to 400 degrees F. Chop everything but the mushrooms into bite-size pieces and throw into a bowl. Add 1 tsp extra-virgin olive oil, and salt and pepper to taste. Try not to think about Rachel Ray while you’re using the EVOO. (I’m convinced she’s an alien. And I hate the term EVOO.) Toss to coat. Spread out mixture onto a rimmed baking sheet. Top that layer with the mushrooms, almost as if you were adding pepperonis to a pizza. I like to keep the mushrooms on top so they get cooked through really well…because as much as I love cooked mushrooms, I hate raw ones. Sprinkle everything with some garlic powder, and drizzle a tiny bit of olive oil over the top, with your thumb corking the bottle opening to allow only a small amount to escape. Bake 20 minutes. Remove from oven and stir around to make sure nothing is sticking. Return to oven for another 10 minutes. Enjoy!

Tasty Thursday: Chicken Tacos

shredded-chicken-tacos

A couple weekends ago, I had some people over for dinner and board games. (I love Trivial Pursuit, and I am not ashamed to admit it.) I made chicken tacos using the crockpot. I love my crockpot. Here is the very easy recipe.

Crockpot Chicken Tacos

1 pkg boneless, skinless chicken breasts
1 pkg taco seasoning
1 jar salsa
2 onions, coarsely chopped
2-3 jalapenos, chopped

Put the chicken, onions, and peppers in the crockpot. Mix together the salsa and taco seasoning. Pour over the chicken. Cook on high 4-6 hours or low 6-8. When it’s done, use a fork to shred the chicken. Serve with tortilla shells and all kinds of toppings, like lettuce, tomato, cheese, sour cream, guacamole, etc.

Since shredded meat is the basis for 99% of all Mexican food (well, maybe Americanized Mexican food), this mixture can be used to make whatever you like — tacos, burritos, salad, nachos, you name it.

« Older entries